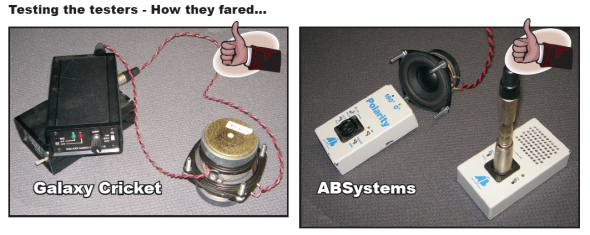
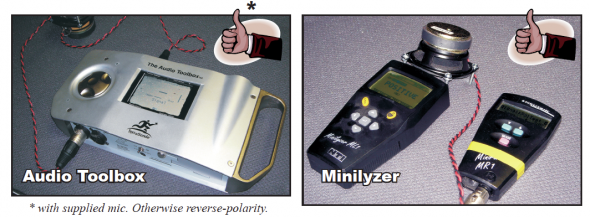
Always Test the Testers
Don Davis frequently said to “Always Test the Testers”. Pat Brown presents a scenario where he forgot to test the tester.
By Pat BrownSound system technicians should test the polarity of all components when installing a sound system. I always demonstrate several methods during the Sound Reinforcement for Technicians seminar. A recent series of events reinforced an admonition that I have heard from Syn-Aud-Con founder Don Davis on many occasions – “Always test the testers!” Here is how the events unfolded. I hope that a lesson I had to re-learn will be useful to other audio techs.
The Scenario
I had just integrated some new equipment into the demo system that we use in the seminars. These included a 3-way loudspeaker, a measurement mic, and an audio multitester. The 3-way loudspeaker was driven by the same signal chain that I have been using successfully in the past. It’s polarity has been verified on many occasions.
Step 1
As part of setting up the DSP for the 3-way loudspeaker I checked the polarity of each component using an impulse response measurement. The IR is considered to be one of the best polarity tests. The leading (left) edge of the IR should indicate the device-under-test’s (DUT) polarity. In this case, it was clearly in the negative direction for the LF, MF and HF, indicating reverse polarity.
This surprised me, as I considered it unlikely (but not impossible) that the manufacturer of this loudspeaker would mis-wire all three components.
Step 2
The logical next step is to try a different polarity tester. I used the same mic and cabling, but this time I checked it with an audio multitester – a device that performs a variety of audio tests, polarity being one of them. This device indicated that the loudspeaker polarity was correct for all three components, contradicting the IR test. A third, stand-alone polarity test set agreed with the multitester.
Step 3
The IR and the polarity tester(s) were clearly in conflict. I decided to try one more method. The simplest, most accurate, and most easily interpreted of all polarity tests is the application of a small DC voltage directly to the voice coil of a cone-type loudspeaker. I pulled out a 9V battery and applied it to the LF transducer, taking care to get the “+” to “+” and the “-” to “-”. The loudspeaker clearly deflected outward (toward the listener), indicating that it was properly polarized.
So, the polarity testers and battery were in agreement, and all contradicted the IR. This was puzzling to me, even to the point of doubting the IR regarding device polarity. Batteries don’t lie, and the polarity testers agreed with it. I even posted my concerns about the IR to the TEF listserv, since there was a running thread about this very topic. So, for the time being I ignored the IR and went with the results of the battery test, but with the intention of investigating further when time permitted.
Back in Indiana
A few days later our seminar equipment returned to Indiana. I set everything up in the lab to retest the system. The only difference was that I used a different mic, one that I keep readily accessible on a stand in the lab. I checked the LF polarity using the IR method. The IR was clearly showing an initial positive deflection, opposite of what I had seen on-the-road! The same was true for the MF and HF. I next checked them with the audio multitester, which clearly indicated reverse polarity for each component. The result of the battery test was the same as before. The only difference in the setup was the microphone. I substituted my travel mic (the mic that I had used previously) and got the same results I had gotten on-the-road. The two mics were producing opposite results, clearly suggesting that one of them was polarized incorrectly. The use of a different microphone produced exactly the opposite result as previously measured – the IR polarity was correct, but the audio multitester polarity was reversed. One would immediately suspect the microphone. But why did I get a correct polarity indication with the audio multitester using the same mic?
Further investigation revealed the cause(s) of the polarity confusion.
- 1. The measurement mic that I was using on-the-road is pin 3 “+” which is reverse polarity.
- 2. The audio multitester is pin 3 “+” which is reverse polarity.
- 3. This mic when used with this multi-tester indicates correct polarity (two wrongs DO make a right).
- 4. The battery, IR, and stand-alone polarity tester are in agreement, and indicate the correct polarity of the loudspeaker.
These conclusions were verified by the supplier of the microphone and the manufacturer of the multitester. In their defense, the multitester indicates correct polarity when used with the supplied microphone (which is pin 3 “+”) but will indicate polarity incorrectly when used with a properly wired microphone. Since many audio people use a different mic than the one provided, this is a potential source of confusion.
Conclusions
What can be learned?
1. Measurement mics (like all microphones) should be checked for correct polarity.
2. Test instruments (even expensive ones) should be tested for correct polarity.
3. Check before you mix-and-match microphones and multitesters, even though both use standard XLR connectors and phantom power.
4. When conflicts arise, seek a simple, infallible method to resolve them (in this case the 9V battery).
5. The burden of polarity verification is always on the technician. Audio gear will never be exempt from the need for this, regardless of how advanced it may seem. If mics and testers can be mispolarized, so can other audio components.
6. If something doesn’t seem right, it probably isn’t right.
In short “Always test the testers!” pb


