Useful Tips for Using Euroblock Connectors Correctly

Pat Brown explains some peculiarities of Euroblock Connectors and gives some useful tips for using them correctly.
We get a lot of folks from IT in our seminars. Most are horrified at the myriad of connectors found on audio gear. I always warn them that in audio, we’re always adding connectors but we never get rid of any! The Euroblock connector is especially confusing, so here are some of the major tenets regarding their use.
The Name
Euroblock is short for “European-style Terminal Block.” This is a low-voltage connector that finds common use on audio gear due to its low cost and small footprint. This allows a large number of connectors to be placed on an equipment chassis. They are also known as “Phoenix” connectors since a dominant manufacturer is Phoenix Contact.

Photo 1 – Euroblocks allow many more connections on a given panel than XLRs (courtesy AtlasIED).
Gender
The equipment chassis holds the male Euro. The cable is wired with the female. In-line, or “free hanging” male connectors are useful for making adapter cables, etc. but are surprisingly difficult to find. Don’t be surprised if don’t find universal agreement on which is male and which is female.
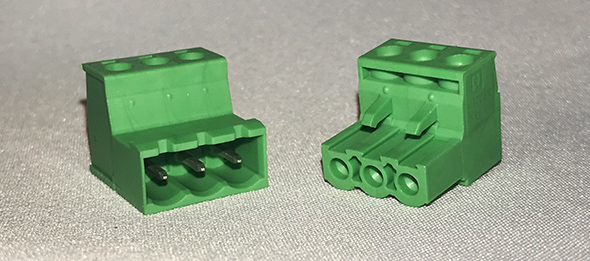
Photo 2 – The male Euroblock connector is on the left. The female is on the right. Chassis-mount connectors are male. Cable-mount connectors are female. An exception is the cable-mount male connector on the left.
Position and Pitch
The two key words regarding the physical size of a Euro are position and pitch. A one position Euro has three electrical contacts, and is suitable for connecting one channel of balanced analog (or sometimes digital) audio. Warning, this could also be called a “3-pole” or “3-contact” Euro based on conventions that were around long before Euros were used in audio.
So, a four-position Euro can connect 4 channels. Easy enough.
It is important to use the proper Euro “size” for the audio product. This is referred to as pitch. There are several pitches, some of which are nearly identical. This becomes quite apparent for multi-position Euros. If you have to force it, it’s the wrong size.
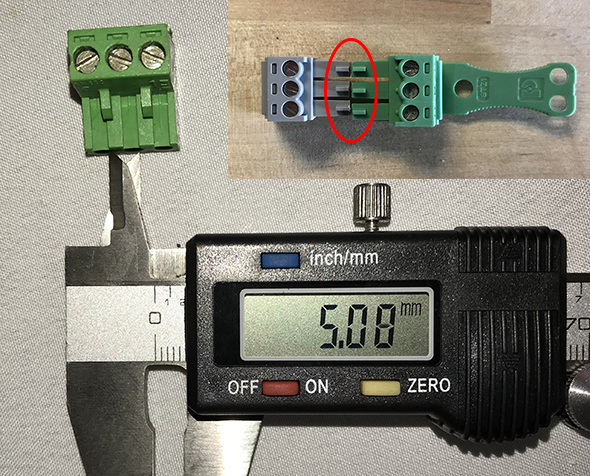
Photo 3 – The most popular Euro pitch is 5.08 mm. There are several other common values, some of which appear identical at first glance (inset).
Pin Out
In audio a balanced analog input or output always has 3 electrical contacts – plus, minus, and shield. The “pin-out” or order of the contacts is product-dependent. It is usually consistent within a product line but can vary from brand-to-brand. Examples of all possible orders can be found in the marketplace. The correct order should be silk-screened on the product chassis. Follow it! This can be especially confusing since Euro’s are now available where the plug itself is screened with plus, minus, and shield.
Just because you get sound doesn’t mean it is wired properly. The world is full of impaired balanced analog interfaces due to incorrectly wired Euroblocks.
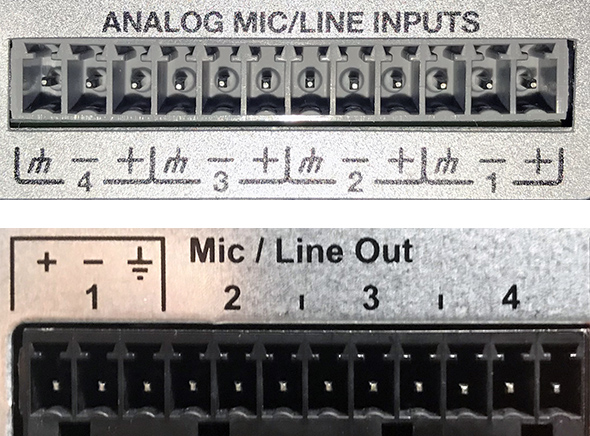
Photo 4 – Two popular digital signal processors use opposite pin-outs. Even the channel order varies from product to product. Note that the chassis-mount connectors shown are male.

Photo 5 – Euroblock connectors with labeled terminals are now available, as are several colors. Regardless of the labels on the plug, you must wire them according to the silk screening on the equipment chassis (Photo 3).
Multi-position Euroblocks
Large blocks can be difficult to plug and unplug, even more so when there are large numbers of connectors on a panel. For my traveling seminar rig I add a “pull handle” made from an insulated wire between the most widely spaced shield terminals. Some Euros have strain reliefs built in that can help with plugging/unplugging.
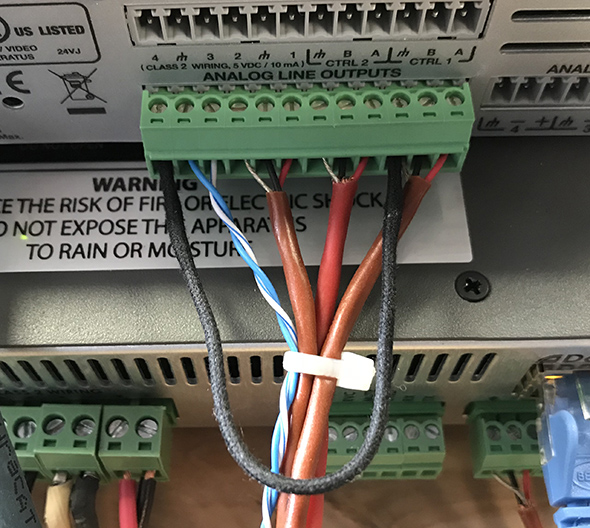
Photo 6 – Unlike XLR connectors, Euroblock connectors are not designed for multiple plug/unplug cycles. A pull wire can help reduce flexing of the chassis-mount connector (courtesy Symetrix).
Faults
Probably the most common wiring fault is a “whisker” from one wire touching the adjacent terminal. Wire ferrules will eliminate this problem, and they will also facilitate changes to the pin out if you need to reorder them.
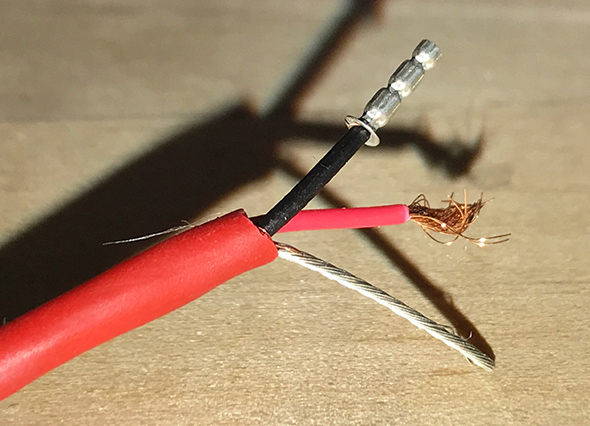
Photo 7 – Crimp-on ferrules can prevent stray whiskers and facilitate re-ordering the wires.
Color
An unofficial convention is that green Euros are used for inputs and orange for outputs. But, you will find exceptions to this convention, as well as black and brown Euros. Of course there’s no difference in the connector itself – just the color.
Audio Testing
Audio folks often need to place a voltmeter across an input or output. Euros can make this difficult, especially if the unit is in an equipment rack. A little gadget I use is a tweezer probe to XLR adapter to interface to my Clio measurement system. The tweezer can be wielded with one hand, and touch the plus and minus contacts either on top or where the wires enter the connector.
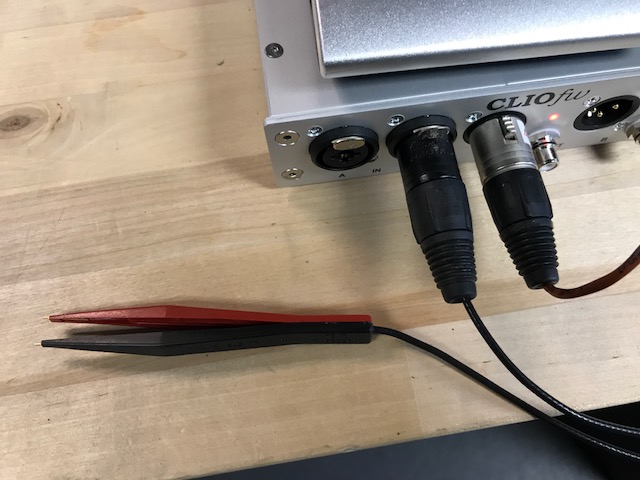
Photo 8 – A “tweezer probe” is useful for analog voltage measurements.
In Conclusion
If you work primarily with one brand of equipment, you might be unaware of the many Euroblock options. If you work with multiple brands you have learned to pay close attention to how you wire up cables. Just “grabbing a cable and plugging in” can get you into trouble with Euroblocks, as can buying pre-built cables from suppliers. If you stay in audio long enough, you will accumulate a Euroblock inventory that includes all of the positions, pitches, and colors. It’s a bin in my shop that I visit often.
I hope these clarifications and tips help you traverse the void from IT to audio. Welcome to the wild west of technology. pb
